SpringCloud微服务实战入门

什么是微服务

最早在Martin Fowler的blog中提及:

https://martinfowler.com/articles/microservices.html

  • 一种设计风格
  • 将原本独立的系统拆分成多个小型服务,并且能独立运行
  • 基于API接口通讯协作

同类型的框架

  • 服务:
    • 阿里-Dubbo
    • 当当-DubboX
    • Netflix-Eureka
    • Apache-Consul
  • 分布式管理
  • 批量任务
  • 跟踪

Spring Cloud模块介绍

  • spring-boot-starter-web: 包含web, tomcat,的模块
  • spring-boot-starter-test: 包含JUnit, 其他测试模块
  • spring-boot-starter-actuator: 监控模块
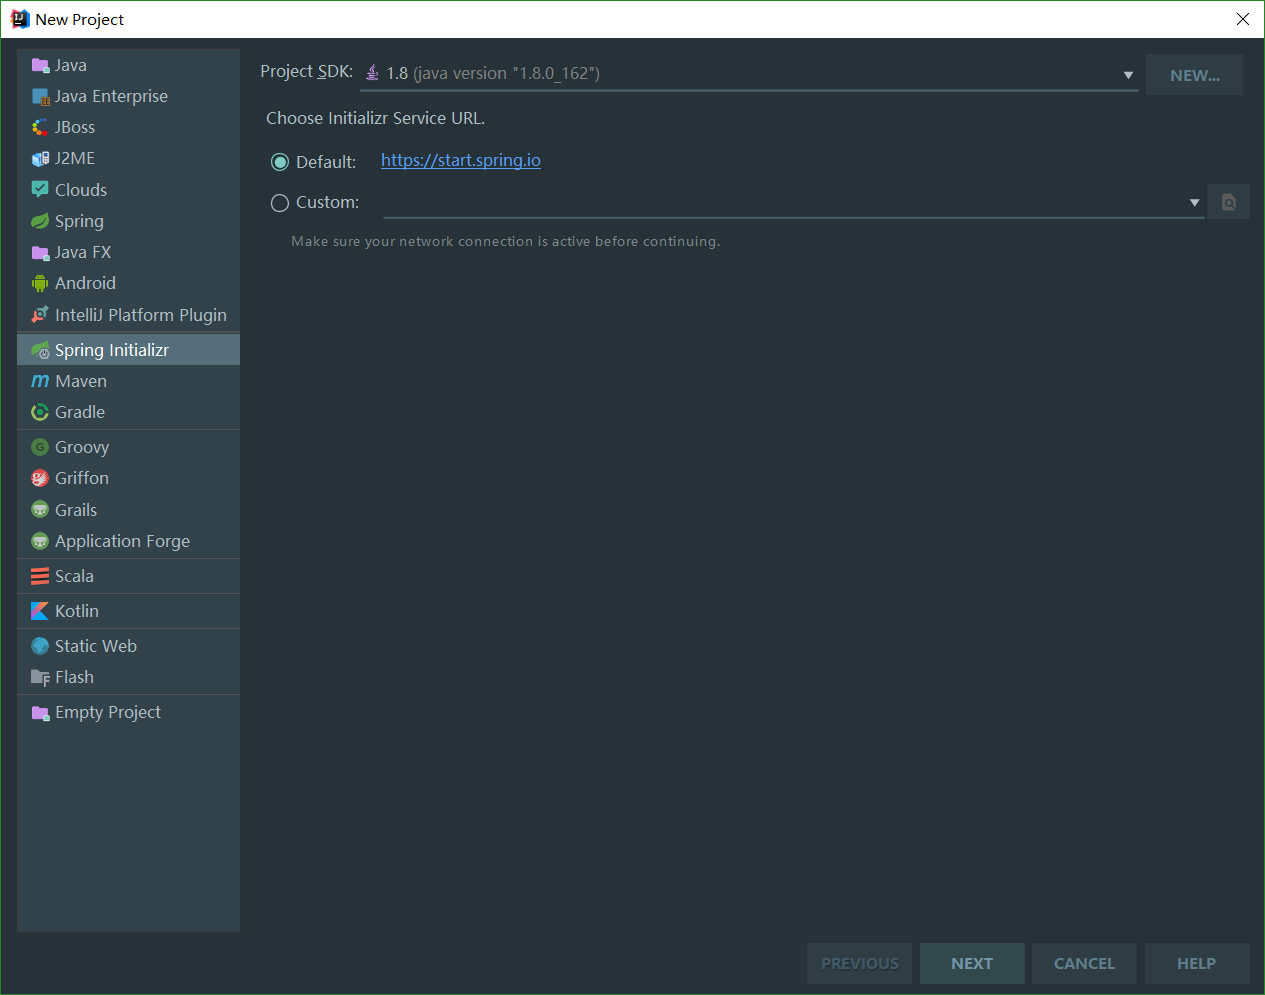
构建项目

选择web依赖

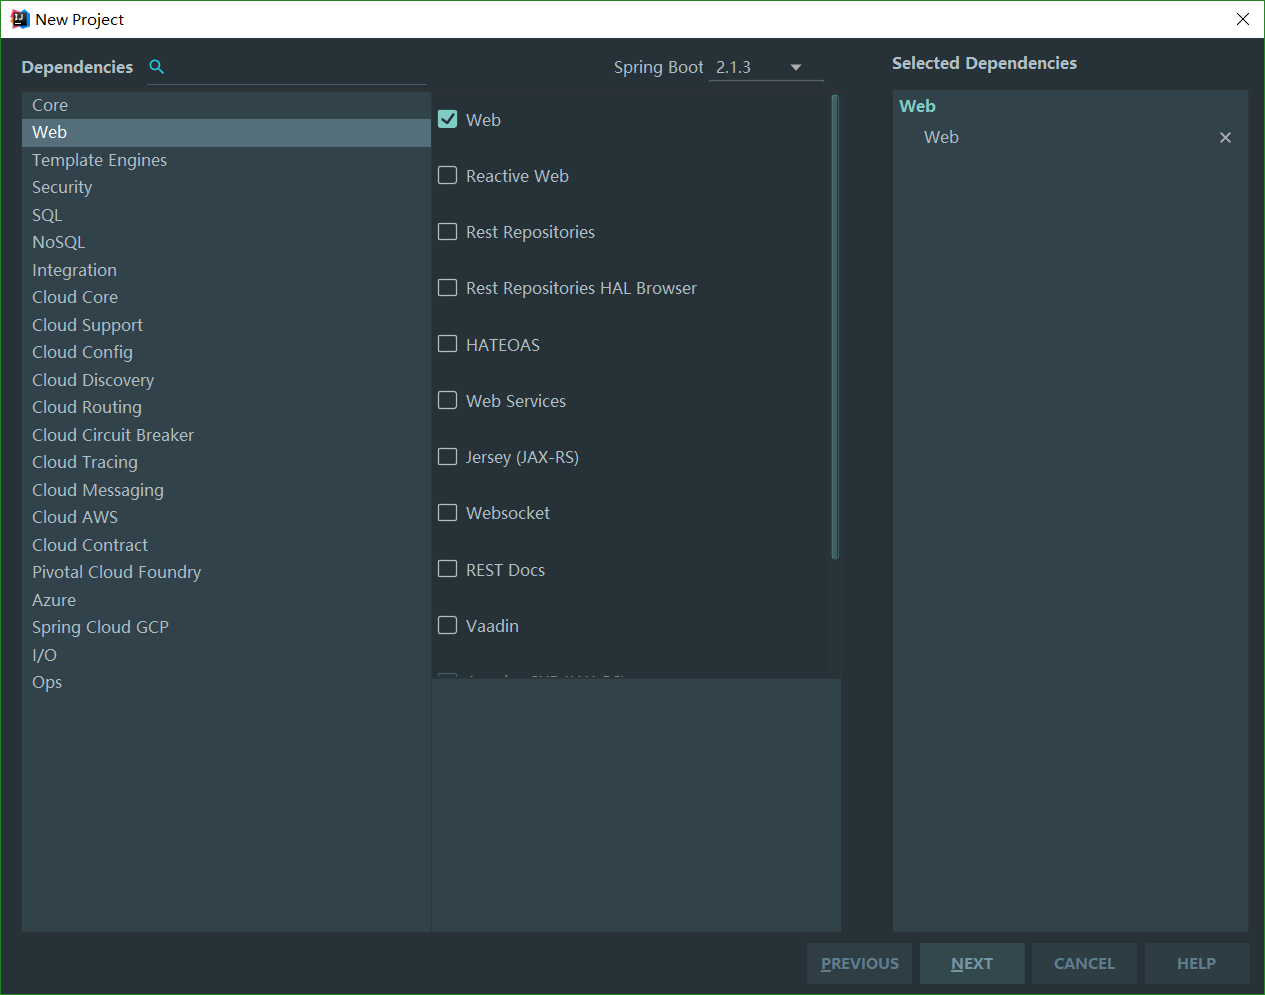
选择Maven构建工具完成后配置文件:pom.xml

1
2
3
4
5
6
7
8
9
10
11
12
13
14
15
16
17
18
19
20
21
22
23
24
25
26
27
28
29
30
31
32
33
34
35
36
37
38
39
40
41
42
43
44
45
46
47
48
49
50
51
52
53
54
55
56
57
58
59
60
61
62
63
64
65
66
67
68
69
70
71
72
73
74
75
76
77
78
79
80
81
82
83
84
85
86
87
88
89
90
<?xml version="1.0" encoding="UTF-8"?>
<project xmlns="http://maven.apache.org/POM/4.0.0" xmlns:xsi="http://www.w3.org/2001/XMLSchema-instance"
xsi:schemaLocation="http://maven.apache.org/POM/4.0.0 http://maven.apache.org/xsd/maven-4.0.0.xsd">
<modelVersion>4.0.0</modelVersion>
//必须依赖spring boot
<parent>
<groupId>org.springframework.boot</groupId>
<artifactId>spring-boot-starter-parent</artifactId>
<version>2.1.3.RELEASE</version>
<relativePath/> <!-- lookup parent from repository -->
</parent>
//通常是域名 = 包名
<groupId>com.xyxj.spring</groupId>
//这里对应打包后的输出名xxx.jar
<artifactId>demo</artifactId>
//版本
<version>0.0.1</version>
//项目名字
<name>demo</name>
//描述
<description>Demo project for Spring Boot</description>

// Java版本和Kotlin版本
<properties>
<java.version>1.8</java.version>
<kotlin.version>1.2.71</kotlin.version>
<project.build.sourceEncoding>UTF-8</project.build.sourceEncoding>
<project.reporting.outputEncoding>UTF-8</project.reporting.outputEncoding>
</properties>

// 项目依赖
<dependencies>
<dependency>
<groupId>org.springframework.boot</groupId>
<artifactId>spring-boot-starter-web</artifactId>
</dependency>
<dependency>
<groupId>com.fasterxml.jackson.module</groupId>
<artifactId>jackson-module-kotlin</artifactId>
</dependency>
<dependency>
<groupId>org.jetbrains.kotlin</groupId>
<artifactId>kotlin-reflect</artifactId>
</dependency>
<dependency>
<groupId>org.jetbrains.kotlin</groupId>
<artifactId>kotlin-stdlib-jdk8</artifactId>
</dependency>

// 测试
<dependency>
<groupId>org.springframework.boot</groupId>
<artifactId>spring-boot-starter-test</artifactId>
<scope>test</scope>
</dependency>
</dependencies>

<build>

//文件夹路径, 我这里是用kotlin开发 <sourceDirectory>${project.basedir}/src/main/kotlin</sourceDirectory>
<testSourceDirectory>${project.basedir}/src/test/kotlin</testSourceDirectory>
//插件: spring boot, kotlin
<plugins>
<plugin>
<groupId>org.springframework.boot</groupId>
<artifactId>spring-boot-maven-plugin</artifactId>
</plugin>
<plugin>
<groupId>org.jetbrains.kotlin</groupId>
<artifactId>kotlin-maven-plugin</artifactId>
<configuration>
<args>
<arg>-Xjsr305=strict</arg>
</args>
<compilerPlugins>
<plugin>spring</plugin>
</compilerPlugins>
</configuration>
<dependencies>
<dependency>
<groupId>org.jetbrains.kotlin</groupId>
<artifactId>kotlin-maven-allopen</artifactId>
<version>${kotlin.version}</version>
</dependency>
</dependencies>
</plugin>
</plugins>
</build>

</project>
  • 配置详情 src/main/resources

    • application.properties:
    1
    2
    3
    //分别配置server和spring
    server.port=8080
    spring.application.name=hello
    • 也可以使用YAML来配置
  • 命令行参数

1
jar -jar demo.jar --server.port=8080 //同样可以指定端口
  • 多环境配置

    • 分别使用application-dev, -test, -prod来表示加载那个配置文件
    • 在application.properties中设置spring.profiles.active=test来生效
  • 创建单元测试test

1
2
3
4
5
6
7
8
9
10
11
12
13
14
@RunWith(SpringRunner.class)
@SpringBootTest
public class DemoApplicationTests {
@Resource
GreetingController controller;

@Test
public void greetingTest() {
controller.greeting("xyxj");
}

}

//可以看到打印greeting
Donate comment here